Full Access UTV
Kawasaki KRX & KRK4 Billet Carrier Housing & Bearing Upgrade Kit
Kawasaki KRX & KRK4 Billet Carrier Housing & Bearing Upgrade Kit
Couldn't load pickup availability
MADE IN THE USA!
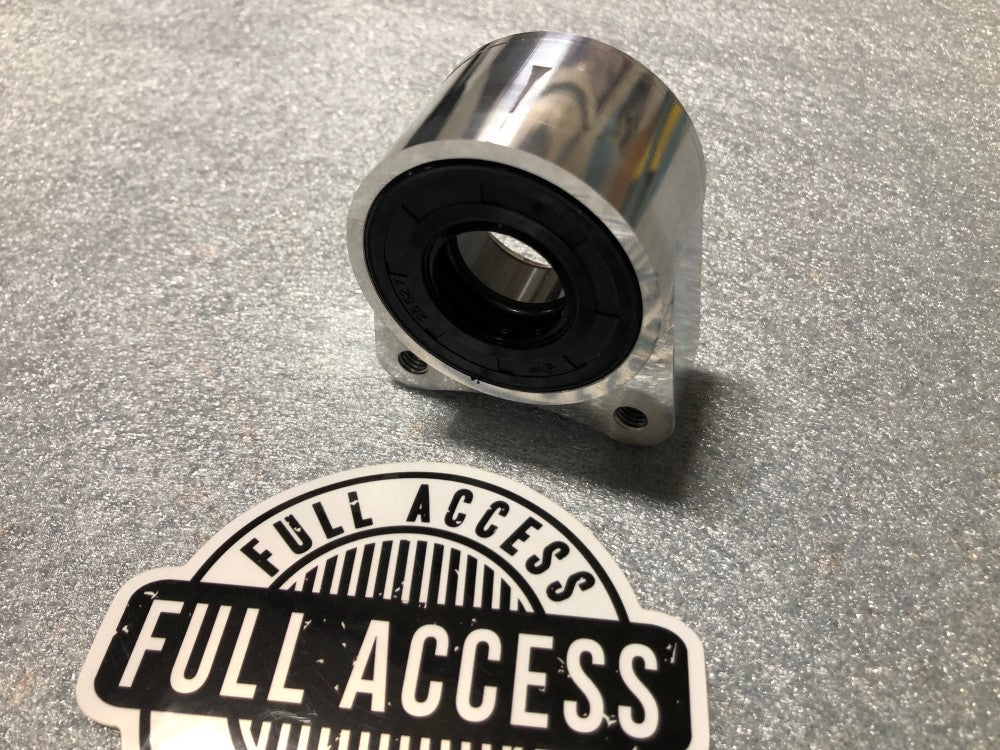
CNC Billet aluminum housing with a quality Timken sealed ball bearing!
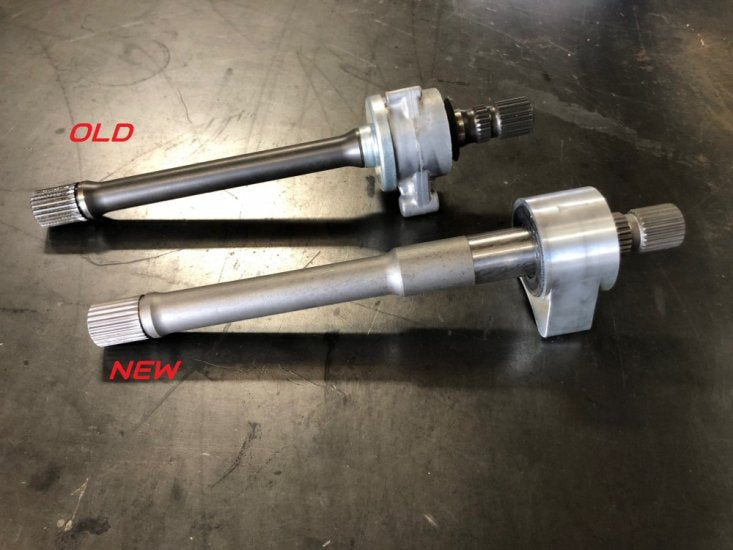
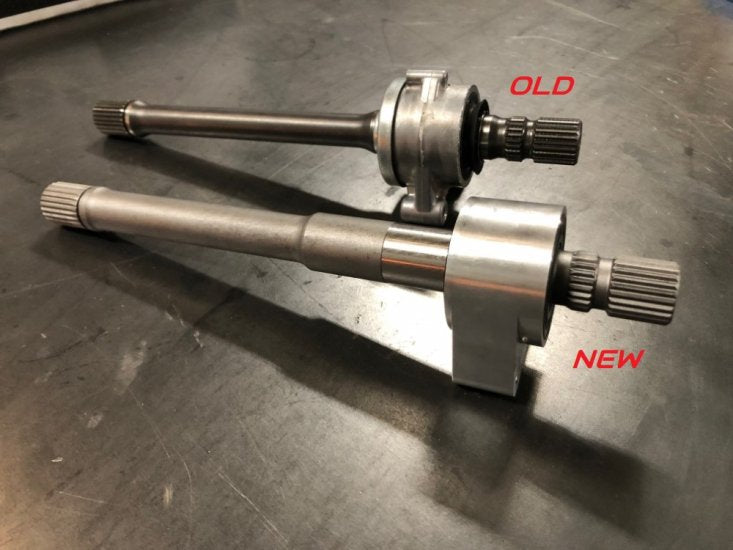
The KRX has been out for over 5 years now, and we are seeing the stock Kawasaki KRX output shaft carrier and carrier bearing are becoming a failure point. Driveline vibrations are one issue, as well as total explosion of the carrier unit. Some customers just break the cast aluminum housing apart, while others have complete bearing failure which eats the output shaft. Both can lead to the shaft breaking or being ruined. Worst case it breaks the oil pan and you lose an engine due to no oil.
The bearing is to small and it allows contaminants which shortens its life.
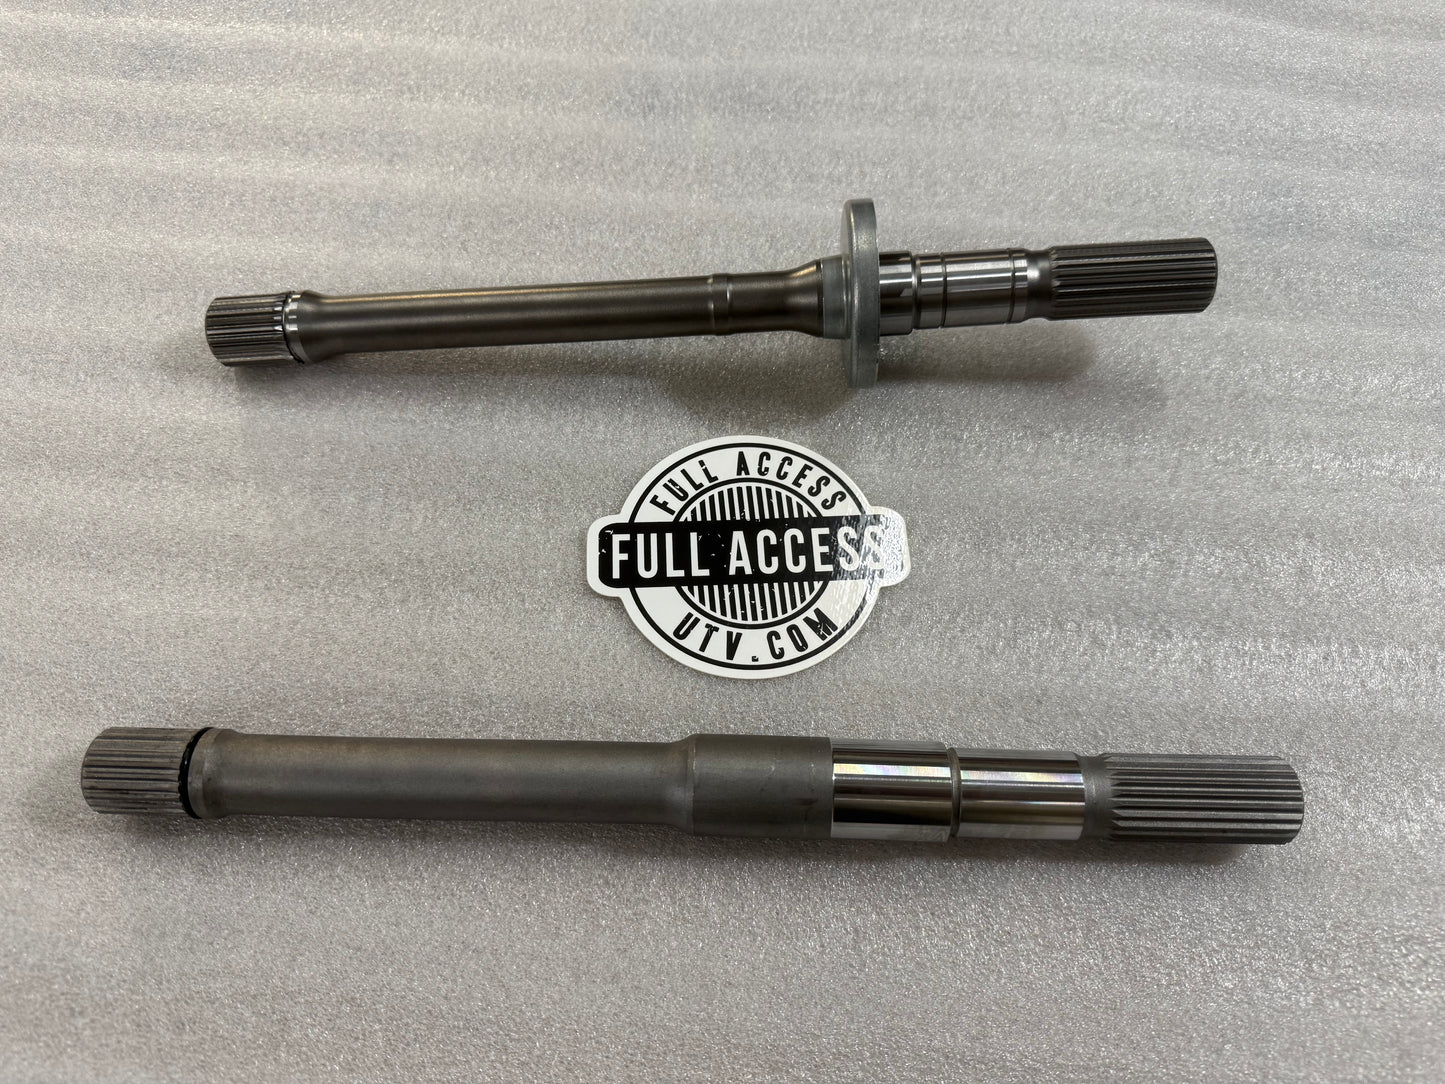
Well the cure is nothing new. We are not the first on the market with these, and we wont be the last. Our new billet carrier is machined from a block of 6061 billet aluminum and uses a much larger Timken sealed bearing. If your using this billet carrier with our 4340 chromoly output shaft, then it come with a seal for both sides that is sure to extend the life of the bearing and shaft.
Note: Our original output shafts only work with the 2020 - 2024 models and KRX4 4 seat 2025+ models. The 2 seat 2025 models have a different shaft that are a little longer with a little bump in the neck down area. We now have the updated version available. Call or email us if you have any questions. Thank you Full Access UTV
More information about our new 4340 Chromoly output shaft can be found by ***Clicking HERE***
LOTS OF INFO.
You can also add a chromoly output shaft at a discounted price in the drop down menu above.
Includes:
1- billet carrier bearing with Timken bearing and snap ring.
1- Loctite for the carrier bearing to shaft
Notes:
-1 year warranty
-Installation requires pulling your front diff forward. This is not a quick simple install, but needs to be done.
- Replaces Kawasaki 41046-0037
Installation video:
Check out the updated installation video for the new output shaft here:
Basic directions:
NOTE 1: Do NOT let the drive shaft come apart. If it does you will need to phase the u-joints. You can google the term for a better explanation. If you don't have it correct, you will experience horrible driveline vibration, and in most cases have to remove the front differential and drive shaft to get them into phase correctly. It sucks, don't do it. Be slow and methodical.
1. Loosen and remove pinch bolts on drive shaft yokes at the output shaft area. Note these bolts slide through a channel cut into the output shaft. They must be re-aligned during assembly.
2. Remove the 4 bolts on the bottom of the front differential to slide it forward. If you have a winch, it will need to be removed. If you have a 4th arm brace, it will need to be removed.
3.Slide the differential forward with the compete drive shaft.
4. Remove the 2 12mm bolts holding the OEM carrier in place.
5. Pull the shaft from the transmission. It may be tough to remove but it will come out. Sometimes penetrating oil may help.
6. Clean the shaft and decide if your shaft has bearing wear or grooving. If it does, stop and order a new shaft or upgrade to our chromoly output shaft.
6A. If using our chromoly shaft install the new larger seal in the opposite end of the carrier. This end will go forward in the car.
7. Clean the shaft at the bearing mating surface with some brake cleaner, carb cleaner, acetone or? make sure there is no oil residue.
8. Slide the carrier onto the shaft in the correct direction. Don't completely install to the bearing area yet.
9. Apply grease to both side of the shaft at the splines. A little goes a long way.
10. Use the loctite provided between where the bearing will ride and the shaft. A little goes a long way. (please let the loctite set for 24 hours before driving)
11. Reinstall front snap ring.
12. Reinstall the carrier with the 2 factory bolts.
13. Assemble the rest of the drive shaft and front diff per the beginning of the directions.
14. Your done!
Share